|
When working in a VoIP environment, Venta4Net acts as a client application communicating with an IP telephony server. IP telephony servers may be purely corporate (serving the needs of a specific company) or public (providing access to IP telephony services to everyone for a fee).
If you have access to a corporate IP telephony system (you may have heard terms like IP-PBX, softswitch and so on), contact the IP server administrator for help with Venta4Net configuration.
Organizations providing access to IP telephony services for a fee are called Internet telephony service providers (ITSP), VoIP telephony service providers or simply Internet telephony services. Many Internet service providers (ISP) own an IP telephony server and offer these services as well. However, there are services that focus exclusively on Internet telephony – such as callcentric.com (www. callcentric.com), for instance.
In order to work via an ITSP server, you will need to activate the service (as a rule, sign up on the provider’s website), get your account details for connecting to the server (login, password, sometimes a few additional parameters). After that, you will need to enter these details in the program. Some providers offer (as part of a service package or as an extra option) a phone number for incoming calls. This number is often used as your account login.
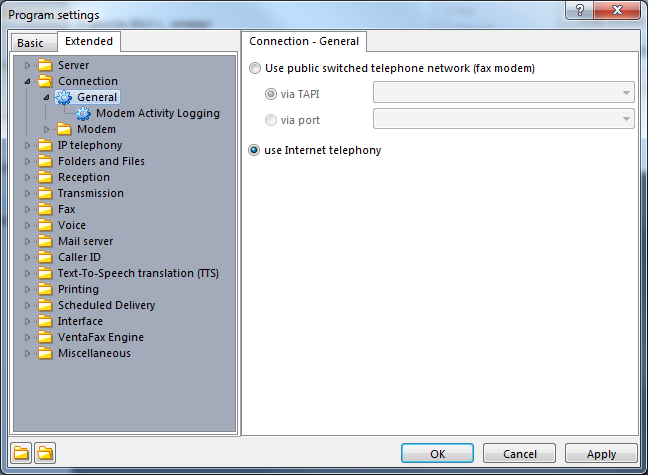
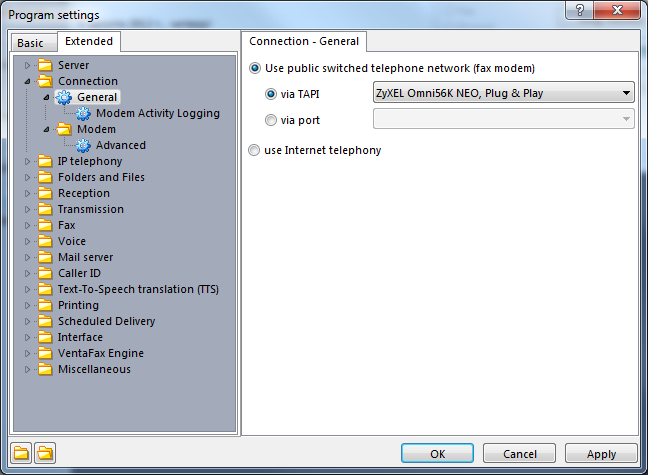
Creating an account
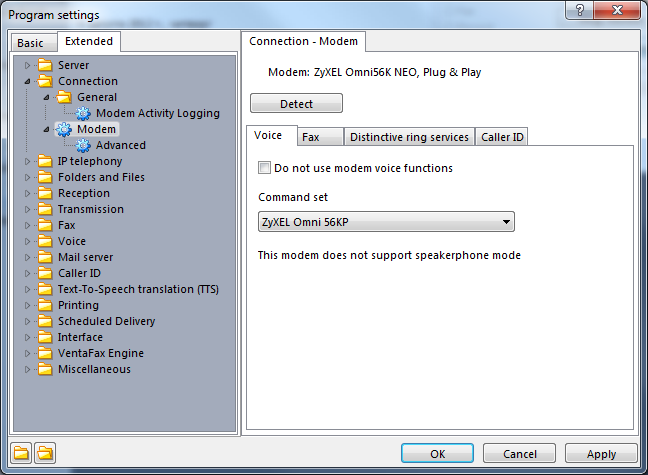
In the settings window, open the IP telephony – Accounts tab. Click the Add button and fill out the following fields in the new window.
Name. Enter any text – for instance, your provider’s name.
SIP server host name or IP address. Specify the name of the server the program will connect to (or its IP address). This information is usually provided by the server (or ISTP) administrator. For instance, callcentric.com if you are using Callcentric.
Port. The default value is 5060. Do not change unless absolutely necessary.
SIP ID or user name. Enter the SIP ID or login that you received.
Password. Enter the password you received.
Authentication name. Specify this parameter if it’s provided in the instructions you received.
Outbound proxy server. Specify this parameter if it’s provided in the instructions you received.
Local address. If you computer has several network interfaces, specify the IP address of the one that should be used for communication with the IP telephony server.
Protocol. Select the protocol that the program will use to exchange data with the provider. SIP is used by default.
Maximum number of simultaneous connections. This value may be less or equal to the number of lines. Not all IP telephony servers support simultaneous connections.
Disable T.38 protocol. Some providers and corporate IP telephony systems do not support the T.38 protocol. In such cases, "passthrough" fax transmission via the G.711 voice codec is used. As a rule, this transmission method is selected automatically. However, in a number of situations it is advised to forcefully disable the use of the T.38 protocol with the help of this option.
Make sure that the flag opposite the Use option is set and click OK.
There may be more than one account. You can also sign up on several IP telephony servers. To add extra accounts, repeat the steps described above for every additional account you need.
Editing an account
Select the account you need to edit and click the Edit button. Make the necessary changes in the newly opened window and click OK. To delete an account , click the Delete button and confirm deletion.
Configuring the routing rules
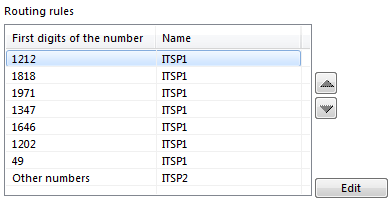
As a rule, when IP telephony is used, the cost per minute may differ depending on the call destination. Calls to certain cities and/or countries may be cheaper when made through a specific account. Let’s use an example. Suppose that you have two accounts with two different IP telephony providers – ITSP1 and ITSP2. Assume that it’s cheaper to use ITSP1 for calls to Washington, D.C., New York and Germany, and the second one is better for all other destinations. If you want the program to automatically select the most suitable ITSP, you need to properly configure the routing rules.
In the Routing rules list, select ITSP1 and click the Edit button on the right. In the newly opened window, fill out the First digits of the number (e.g. country and area codes) list according to the following rules. Each line of the list must contain a country code (and an area code, if needed). For New York, for instance, you need to enter 5 numbers: 1212, 1718, 1917, 1347 and 1646, where 1 is the country code for the US and Canada, and 212, 718, 917, 347 and 646 are New York City codes). For Washington D.C., enter 1202, and for Germany, enter the country code only – 49. The resulting list will look like this:
1212
1718
1971
1347
1646
1202
49
Uncheck the Other numbers parameter. This is done to make other destinations unavailable through this operator. Click OK. The list of rules will look as follows.
If you need to specify the full number and not its initial digits only (for instance, for an internal PBX), you should enter the equals sign before the number. For example, 101 as a full number should be entered as:
=101
If for any reason you need to disable the T.38 protocol for a specific number, add the following parameter to the record:
=101-t38
This will instruct the program to use the G.711 passthrough protocol instead of T.38.
Sometimes, you need to remove one or several initial digits from the numbers you dial. To do that, enter the initial digits of the number and then the number of digits to be removed through a slash sign. For instance:
9/1
001800/2
In the first case, all numbers starting from 9 will lose it. In the second example, all numbers starting with 001800 will lose the initial zeros.
Please note that rules are processed in the order of their appearance on the list. If necessary, you can change it by selecting a record and using arrows on the sides of the list to move it up or down.
This concludes he configuration of the routing rules. |